Registration Page
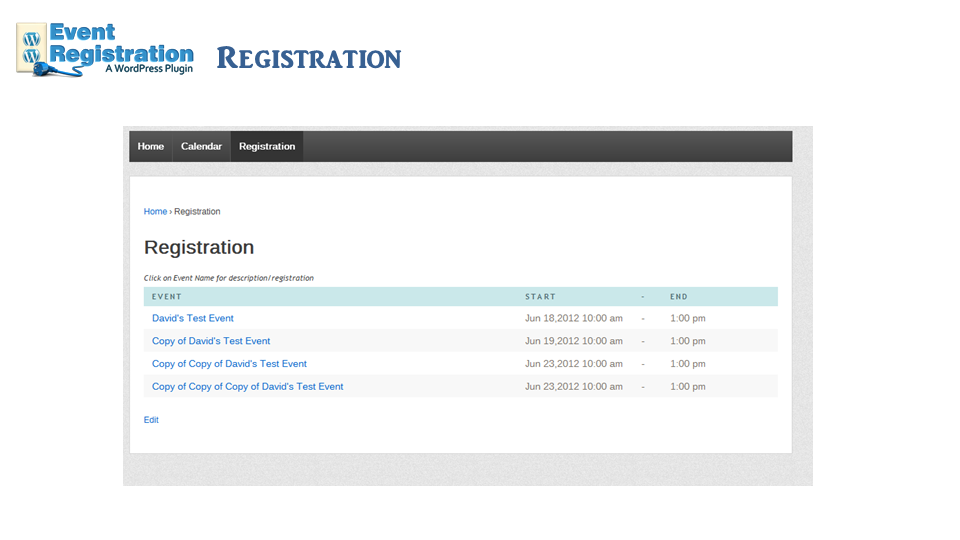
The registration page is the heart of the user side of the plugin and is required in order for the plugin to work properly. This page operates by refreshing the content on the page based upon user selection. By default when the page is viewed first, an event list is displayed.
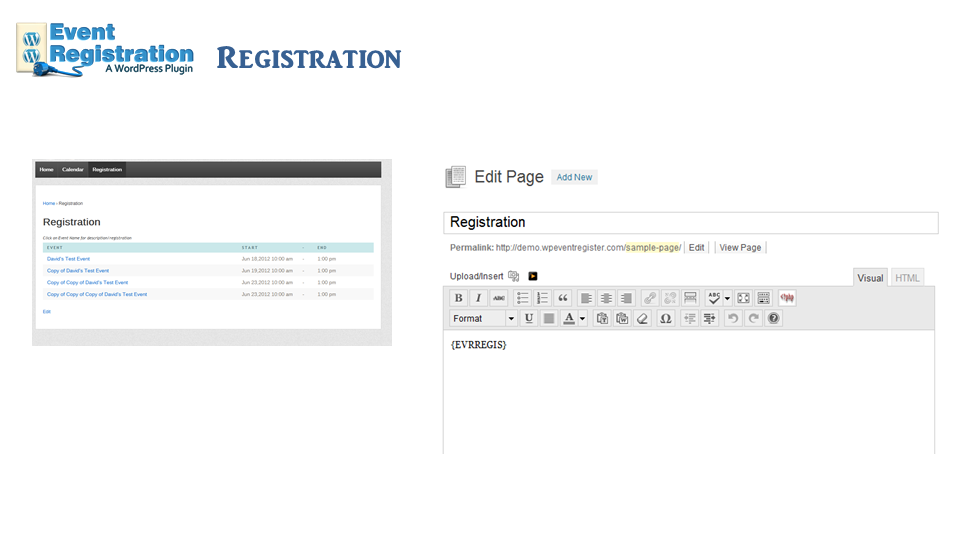
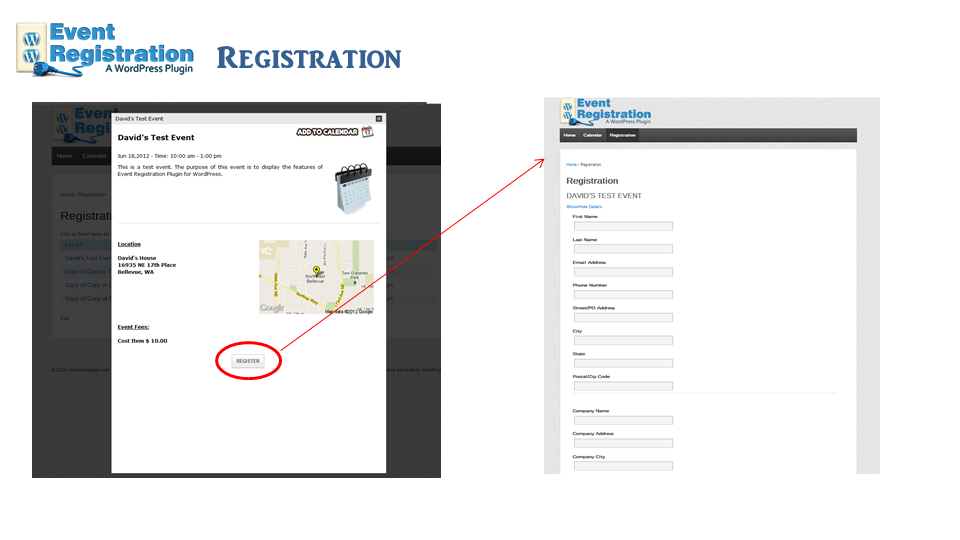
The event list displays all upcoming events with Event Title, Event Start Date & Time and Event End Date & Time. The Event title is a hyperlink that can be a direct link to an external registration site, to a popup window with event details & register button, or a direct link to the registration form for that event. Regardless if you use single evnet or category code event pages, you MUST have a page with the {EVRREGIS} shortcode.
In order for the registration process (and event list) to display, place the shortcode {EVRREGIS} on your registration processing page. This is absolute necessary for the plugin to operate properly. It is recommended to use a page with a single column attribute and turn off comments on that page.
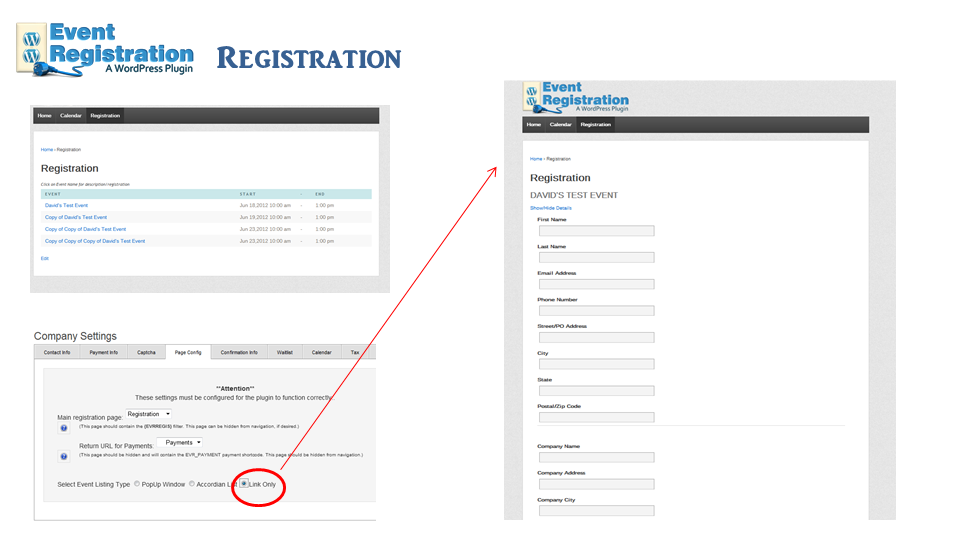
To have the event list function strictly as a link to the registration form, select LINK ONLY in the Company Settings – Page Config Tab.
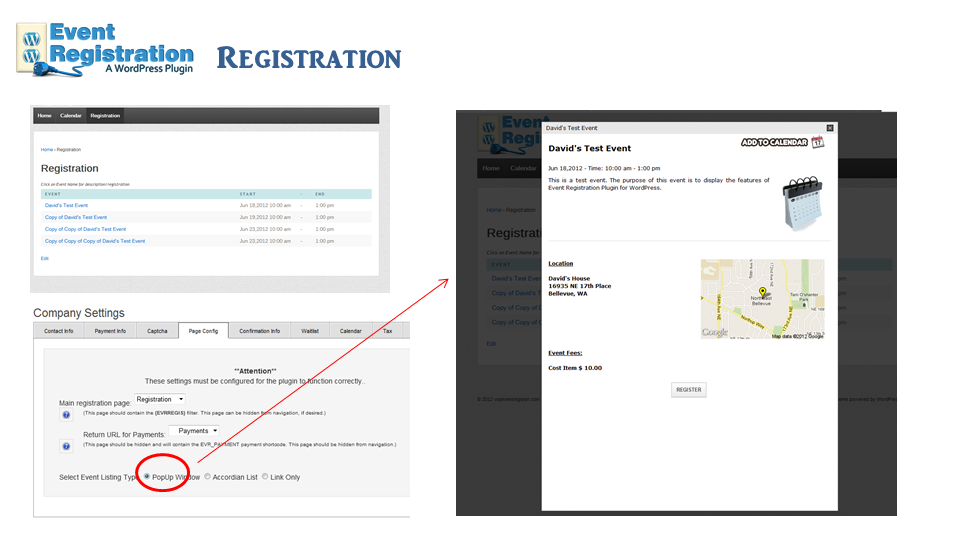
To have the event list open a popup window with event details prior to taking user to the registration form, select POPUP WINDOW in the Company Settings – Page Config Tab. There will be a register button in the popup that will link to the Registration Form. To exit the window instead of registering, click any black area of the screen, or press escape.
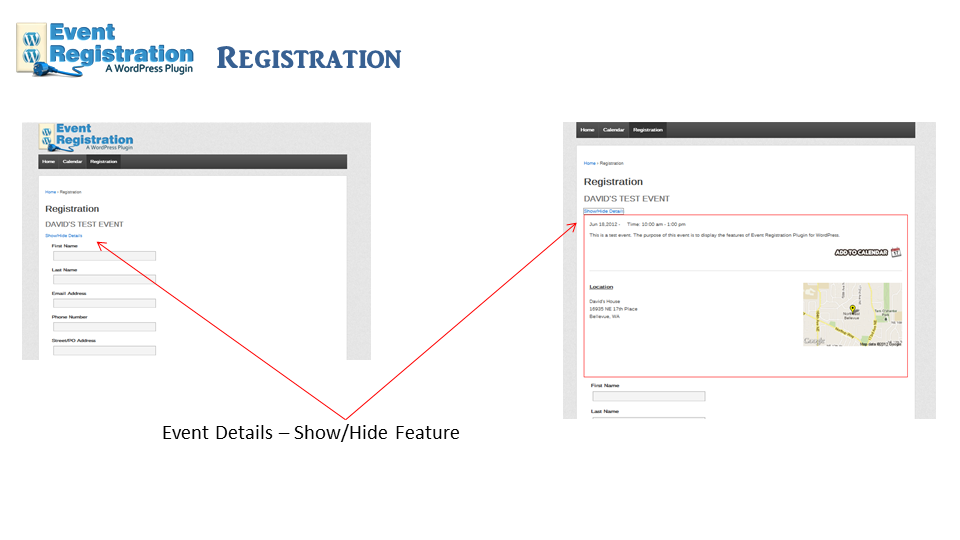
Once the registration form is opened, there is a Show/Hide link under the event name. This link opens and closes an area of the form that displays the event information that typically shows in the event popup window. This is to allow the registrant the opportunity to review the event before begining form completion. Click the link once to open or show the details, click it again to close or hide the details.
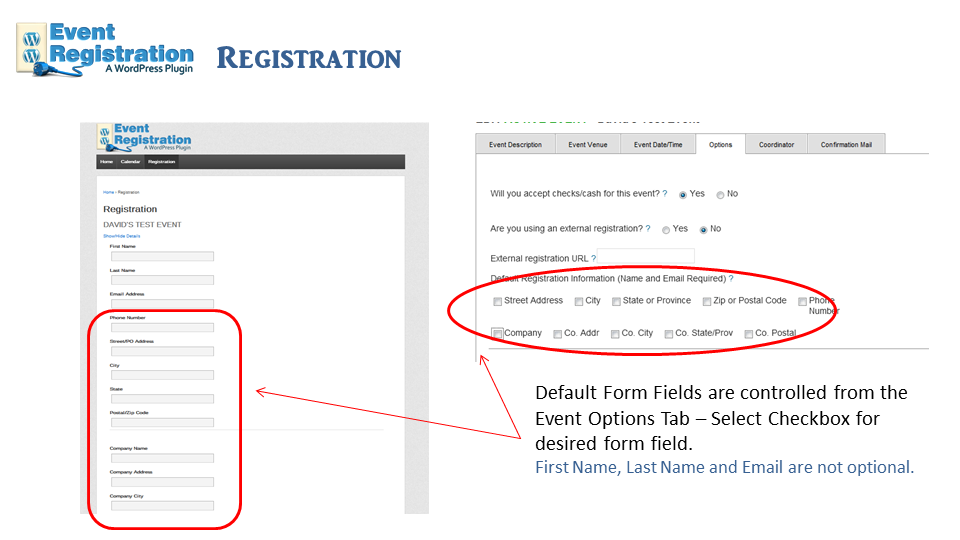
The form fields are made up of three areas: Default, Optional, and Custom.
Default fields that are required on all forms are First Name, Last Name, and email – required for form submission
Optional fields that are selectable when creating an event, from the Event – Options Tab are Address, City, State, Postal Code, Phone, Company, Company Address, Company City, Company State, Company Postal. If selected, optional fields are always required to be complete by the registrant.
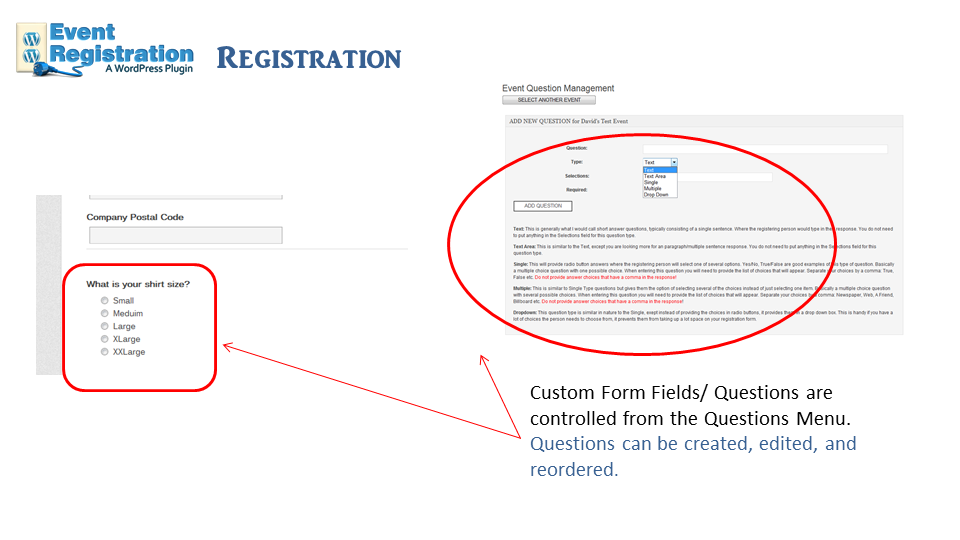
Custom fields (questions) can be created for any event at any time from the Questions Menu. From the Questions page, select the event and then create/edit/reorder the questions for the events. Custom questions supports five (5) types of questions:
- Text: This is generally what I would call short answer questions, typically consisting of a single sentence. Where the registering person would type in their response. You do not need to put anything in the Selections field for this question type.
- Text Area: This is similar to the Text, except you are looking more for an paragraph/multiple sentence response. You do not need to put anything in the Selections field for this question type.
- Single: This will provide radio button answers where the registering person will select one of several options. Yes/No, True/False are good examples of this type of question. Basically a multiple choice question with one possible choice. When entering this question you will need to provide the list of choices that will appear. Separate your choices by a comma: True, False etc. Do not provide answer choices that have a comma in the response!
- Multiple: This is similar to Single Type questions but gives them the option of selecting several of the choices instead of just selecting one item. Basically a multiple choice question with several possible choices. When entering this question you will need to provide the list of choices that will appear. Separate your choices by a comma: Newspaper, Web, A Friend, Billboard etc. Do not provide answer choices that have a comma in the response!
- Dropdown: This question type is similar in nature to the Single, exept instead of providing the choices in radio buttons, it provides them in a drop down box. This is handy if you have a lot of choices the person needs to choose from, it prevents them from taking up a lot space on your registration form.
Custom questions can be required or not required.
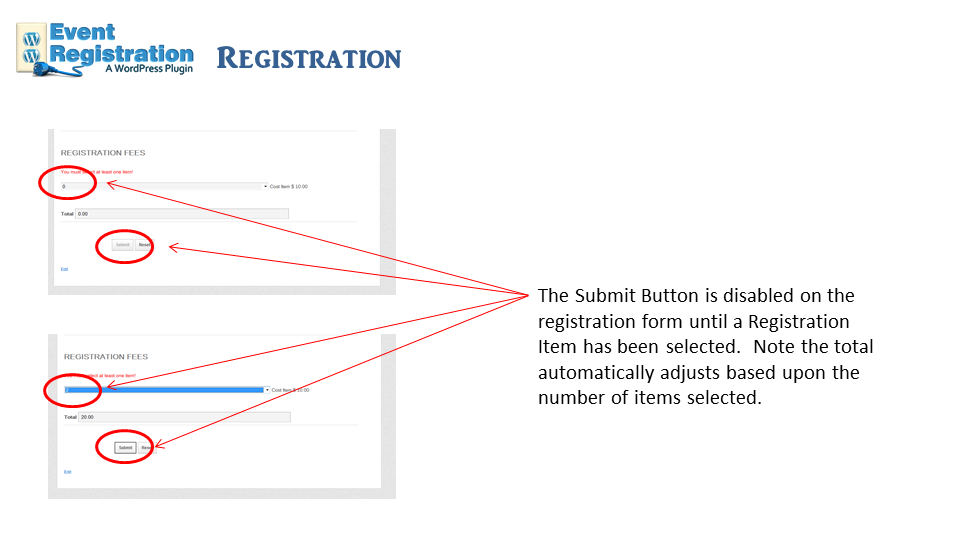
All events require at least one REG type Fee item, even if it is of 0.00 cost. The submit button is disabled on form load. The registrant will not be able to press the form submission button until selecting at least on registration item. Once one item has been selected the submit button is enabled. The purpose of this is two fold: 1.) Attendance count is based upon the number of REG items for an event. 2.) Additional Attendee name fields, if enrolling for more than one person (2 or more items) are generated based upon this selection when the confirmation page is presented.
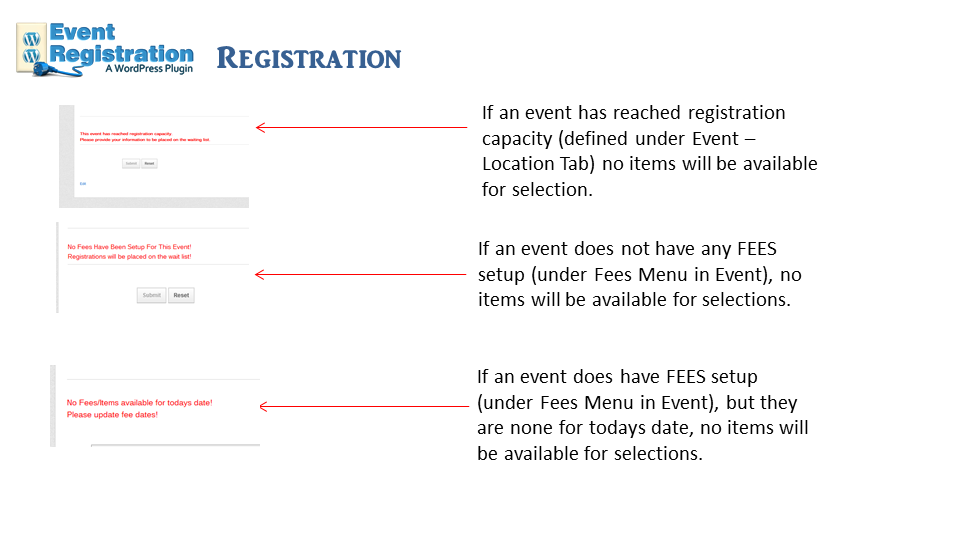
If an Event has reached registration capacity, does not have any fee items, or fee items are not valid within the current date, no fee options selection will be available and the submit button will not function. Always test your events after creating them to ensure they are working properly.

